Friday, November 9, 2012

Make It and Eat It Now Cereal


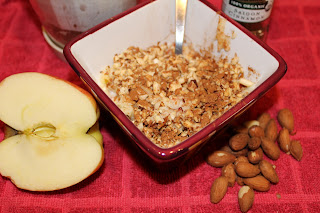
I am eating this as I type.  It was the easiest and quite possibly one of the most delicious breakfasts I have prepared, and it is raw (which means super healthy and good for you).  Got 3 minutes?  Then you can make a VERY healthy breakfast cereal for you and your family.  

Make It and Eat It Now Cereal
Organic apple (I used honeycrisp...our favorite! Any will work)
Soaked and dried almonds (can use anything here cashews, pecans anything soaked)
Organic Cinnamon
Raw milk or coconut milk (no soy...ever!)

Chop up your apple, place in a bowl.  Chop up your almonds, place in bowl.  Sprinkle with cinnamon and pour milk over the top.  Use as much or as little of the 4 ingredients you want.  And eat.  :-)  Soooooo, good!!!

Gonna admit, my 3 year old spit it out.  He is eating the other half of the apple right now, by itself, and seems quite happy though.  Lol


*Recipe from Nicholas Johnson who posted this as a comment on Just Eat Foods FaceBook page.  Don't know ya Nicholas, but a HUGE THANK YOU!!!  :-)
Friday, November 2, 2012

Honey Lemon Ginger Sore Throat Mix

Beautiful!
Well, as we all know, it's that time of year again...sore throat, cough, fever, runny nose...and of course the sharing of all of these things at school and at home.

We had "Run 1" a couple of weeks ago.  Everyone got it except for me.  (Thanks to my Kombucha, lack of sugar and new way of eating that is.  :-)  )

This is a simple, beautiful and oh so delish remedy for sore throat.  Thank you to my friend Tammy for sharing this recipe.  :-)

Honey Lemon Ginger Sore Throat Mix
Organic lemon slices (wash and dry well. slice as thin as you can) I used almost 2 whole lemons.
Organic ginger (I used 2 1 inch pieces for a pint glass jar)
Organic unheated, raw honey
Glass jar

Slice your lemons leaving the rind on the slices.  Place into a glass jar.  Use the back of a spoon to scrape the peel off of your ginger, slice your ginger with the grain (going against the grain is more difficult, but it is prettier that way).  Place ginger in glass jar with lemon slices.


Pour honey over the top of the lemons and ginger.  Use a butter knife to move lemons and ginger around so that honey covers everything.

Let sit in refrigerator for at least 2-3 days before eating/drinking.

When you feel a sore throat coming on, remove glass jar from refrigerator and place a healthy tablespoon full in a coffee cup and pour warm (NOT hot or boiling water) over the mix and stir.  Sip. 

You can store this in the refrigerator for 2-3 months (honey is a natural preservative).

Let me know what you think.  :-)

Notes:
-You will will notice the honey actually dissolves the lemons and ginger and sort of makes a  marmalade looking mix.  Pretty cool.       

-You do not want to use hot or boiling water as this will kill all the good stuff in honey.

-This would make a great gift too!


Enjoy!

*I saw this recipe here.  And my mom says this recipe has been around for years.  :-)

Wednesday, October 31, 2012

Soooo Good Waffles

I forgot to take a pic of it before I over half way devoured it. Lol

I am always looking for a delicious and healthy waffle.  Guess what?  I found one.  Here it is.  My kids loved them!

Waffles
1 1/4 c freshly ground spelt or homemade all purpose (half whole wheat and half barley) I used my homemade all purpose this time
Clabbered raw milk, plain organic yogurt and water or org buttermilk(I used clabbered raw)
2 free range eggs
2 tablespoons grade b maple syrup
Pinch of sea salt (Celtic or Redmonds)
Butter (Kerrygold, RAW or organic)

12-24 hours before you want to eat your waffles place the flour in a glass bowl.  Pour enough clabbered milk, stirring slowly (or organic buttermilk or a combination of plain organic yogurt and water) into the flour to just make it nice and moist.  Cover with a cheesecloth or white unbleached kitchen towel and secure with a rubber band.  Let glass bowl with wet flour set out on your countertop for 12-24 hours.

When you want to prepare your waffles, plug in your waffle maker, remove the cheesecloth from your glass bowl.  Stir in eggs, maple syrup and sea salt.  Then add enough additional clabbered milk, buttermilk or raw milk to achieve the consistency you want for waffles.  You want your waffle batter to be thicker than a pancake batter, keep in mind.

Place butter on a wooden spoon or knife and butter your waffle iron.  Pour batter into iron. My batter was way toooooo thin this morning so I had to cook mine for a loooong time.  

Keep in mind this recipe is not a "win 1st place at a beauty pageant" type of waffle recipe.  And your waffles may not come out as firm as you are used to feeling....but let me tell you, it received a blue ribbon from this judge on flavor!  :-)

And also, I am not proud that I use a teflon waffle maker, not proud at all, but it is what we have right now. :-(

**Always use the ratio of...for every 1/2 cup water use 1 tbsp yogurt when soaking grains or flour.  And ALWAYS ALWAYS ALWAYS soak your grains and flour for 12-24 hours before eating them.


Adapted from Kitchen Stewardship An AWESOME blog!

Friday, October 26, 2012

Homemade Chocolate Peanut Butter Bars

So, year's ago when I was just starting my quest of healthier food I ran across a recipe for homemade larabars.  I read the ingredients list and said "forget it."  Who has dates, prunes and nuts in the refrigerator to make these things??

Then some time passed and my friend at Just Trying to Live Better braved the water and made them.  I was thrilled to read her blog post.  But yet, did I want to invest the time to soak the nuts, dry the nuts, find organic dates and prunes, etc etc.  The answer then was..."well maybe."

The answer now is a big "YES!"

Now, years later they are a staple in our house.  We said goodbye a long time ago to all protein bars and the ever loved Cascadian Farms granola bars.  Now with the homemade larabars my kids think they are getting a candy bar and my husband loves them too.  And I know that they are eating healthy fruit, soaked/crispy nuts and of course a little something extra and fun thrown in.

Here is our favorite recipe right now.  There are a million more waiting for us to try them!

Homemade Chocolate Peanut Butter Bars
1 1/3 c soaked/crispy peanuts (I also want to try soaked/crispy cashews and almonds)
2/3 c semi sweet chocolate chips (I also do 1/3 c carob chips + 1/3 c semi sweet chips.  You can also use milk chocolate chips.)
2 c organic pitted dates (can also do 1 c organic dates + 1 c organic prunes)
1/2 c organic peanut butter
2 tsp homemade vanilla
Reverse osmosis water, 1/2 tsp at a time

Place peanuts in food processor and pulse.  Blend only to the point where the peanuts are now crumbs.  Stop here.  If you keep processing the peanuts you will have peanut butter (yum, but not what we are looking for here).  Place peanut crumbs in a bowl, set aside.

Place pitted dates in your food processor.  Process until the dates form a ball.

Add chocolate chips and 1/2 of the peanut crumbs, use a spoon to break up the ball of dates, process until combined.  Stop.  Add remaining peanuts and peanut butter.  Process until well blended.  You may have to stop and use your spoon to break up the large ball in your processor.  Add vanilla.

You want a consistency that will maintain a "bar" shape.  If your mix looks too dry and crumbly add 1/2 tsp of water at a time, processing in between until your mixture looks slightly moist and most of the ingredients are holding together.

Grease a 9x9 in glass pyrex dish with a small amount of organic virgin coconut oil.

Press bar mixture into the glass dish, flattening with your hand or the back of a spoon.

Let bars sit in refrigerator 4-6 hours or overnight.  Cut into bars.  Wrap in bpa free plastic wrap or unbleached parchment paper and store in a glass container in your refrigerator.  YUM!!!!!!

They make a great "grab on the go" breakfast or snack.


Notes:  I buy organic peanuts through Green Bean Delivery.  I have also bought raw peanuts at Meijer.  I buy organic dates and prunes at Green Bean Delivery, Downtown Farm Stand or Whole Foods.  Organic peanut butter at Meijer.  

Enjoy!


*Recipe adapted from Kitchen Stewardship e-cook book.

Thursday, October 25, 2012

Coconut Chips

So pretty.
I read this on one of my favorite blogs...The Healthy Home Economist and made a batch yesterday!  YUMMO!!!

Coconut Chips
Coconut chips, unsweetened, organic, (or can be called flakes, not shredded)
Organic cinnamon
Sea Salt (Redmonds or Celtic)

Heat a cast iron skillet to medium heat.  Spread a thin layer of coconut chips in the skillet.  DO NOT leave the kitchen...you will regret this.  :-)  Continue moving the chips around in the skillet until they are a beautiful golden brown.

Transfer golden coconut chips to a glass pan or baking stone, spread chips out into a single layer.  Sprinkle with cinnamon and sea salt, whatever amount you like.  Mix.  Spread out again, let cool.  

Continue repeating these steps until you have made the amount you like.  Allow chips to cool completely and store in a glass pyrex bowl or ball jar with lid.

Snack on or use on top of dishes (I am thinking this would taste great on top of my Homemade Cold Breakfast Cereal!).  I am also thinking this would be reeeally good on top of my homemade ice cream!  YUM!!!!

And I am thinking a spicy recipe is in the works....maybe cayenne....or a cayenne/chipotle mix....hmmmmmmm :-)  Do you have any recipes or ideas?

I bought my organic coconut chips through Nutiva, 3 pounds (48 oz) for $13.89.  Whole Foods also sells them $2.99 for 7 oz.  (Bulk is cheaper here.  Nutiva breaks down to $.29 per ounce and Whole Foods is $.43 per ounce.)


Coconut chips and chia on top of Homemade Cold Breakfast Cereal. YUM!!


Click here for Nutiva's website.

Enjoy!!

Monday, October 22, 2012

Easy Breakfast to get Coconut Oil in your Kids

Morning Smoothie in a Cars cup.  :-)
This was sooooo easy, the boys are devouring it so I had to share.

Morning Smoothie
Frozen organic mango
Frozen organic strawberries
Heaping tablespoon of virgin, unrefined, expeller pressed organic coconut oil
Raw milk (or organic milk if you haven't taken the RAW milk challenge :-) )
Chia seeds (and if anyone local wants some I have a ton I am willing to share)

Place in your regular size bullet cup, blender or food processor and blend away.  Serve.

So YUM!!!!

And a MUST make when your kiddos or you are sick.  MANGO is a cold fighter.  And coconut oil is an infection fighter.  Chia offers antioxidants.  Sooo cool.


Enjoy!


Saturday, October 20, 2012

Coconut Oil Chocolate Candy


Coconut Oil Chocolate Candy
1/2 cup coconut oil (organic, unrefined, virgin, cold expeller pressed)
1/4-1/2 cup raw cocoa/cacoa powder, use 1/2 if you want a dark chocolate
2 tbsp organic raw honey, buy local (or use organic grade b maple syrup)
1 tsp pure vanilla extract
Pinch of sea salt
Options:  unsweetened coconut, almonds, pecans, cashews, orange rind, diced dried fruit, caramel.  Do not blend these put place in mold and then pour candy mixture over top, or pour in chocolate and sprinkle options on top of chocolate in your mold.

Place coconut oil in a small glass dish.  Place hot, but not boiling water in a larger bowl.  Place the coconut oil bowl in the hot water and wait for the coconut oil to melt.  NEVER MICROWAVE coconut oil!!!  

Whisk to break the coconut oil into pieces to make it melt faster.  When melted pour melted oil into your blender or bullet and add your cocoa/cacao, honey, vanilla and sea salt (you may have to do the same thing with your raw honey to melt it down, once again DO NOT place in boiling water, you are trying to maintain it's raw unheated state).  

Blend everything well.

Pour into candy molds, mini cupcake pans with liner, glass dish, onto a cookie sheet lined with parchment paper, ice cube trays or anything you want.  Cool for 15-30 minutes in your refrigerator or freezer or until set.  Freezer will give you glossy sheen to the tops.  Enjoy!!!    

Store in refrigerator or freezer.  Seriously, it is sick how easy this is to make!

Note:  These are very delicate chocolates.  They need to stay in the refrigerator until you are ready to eat them.  These will melt in your hand. :-)


Honey I buy here.  Delish!!


Thank you France at www.beyondthepeel.net !!!  Check out her awesome blog!!

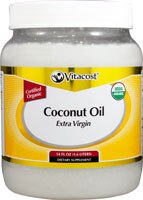
Vitacost Extra Virgin Certified Organic Coconut OilI bought this but haven't tried it yet.


Photo of organic Gold Label Virgin Coconut Oil 32 oz. glass jar from Tropical TraditionsI just bought this.  CAN'T WAIT to try this one!!!  This is supposed to be one of the more superior virgin coconut oils.

Enjoy!

The Miracles of Coconut Oil

The post is inspired by a wonderful friend of mine whom I go waaay back in time with.  :-)  I love you my sister.  And know that I am praying over you and your mom.  I love you both very much.  Always remember miracles are around every corner.
Simply beautiful.

This video is what got me pumped up!!  Click here to view.  Soooooo exciting!

Alzheimer's is now being called "diabetes of the brain."  After numerous failed attempts of a new wonder drug to cure or at least help alzheimer's, many are looking in a new direction.  A direction of food.  And numerous people, as you saw in the video are beginning to see positive side effects from using coconut oil.

Get ready to get up in arms at me.  Evidence is showing that the "wonderful" low fat diet we have all been brainwashed into believing is so great for us, plus all the over prescribed cholesterol lowering medication, just might be what is putting our parents and grandparents on the exam table receiving the heavy words from their doctor of, "you have been diagnosed with alzheimer's."  Grant it, heredity and other factors beyond current released research also contribute to alzheimer's disease.

We need cholesterol in order for our brain to function.  The brain may only take up 2% of our body's mass but the brain contains 25% of our bodies cholesterol.  If you remove cholesterol from your diet, you starve your brain, thus enters alzheimer's when we are older.   Read this for more information.

"People suffering from Alzheimer’s should immediately start avoiding polyunsaturated forms of oil such as soy and corn oils, especially if they are hydrogenated and in the form of trans fatty acids!!!!!!"

So, this blog post is all about the new and incredibly exciting information with regards to coconut oil and dementia and alzheimer's   This is so exciting to me and goes to show how POWERFUL food is.  I remember at a young age hearing someone say that food was medicine.  I thought that person was nuts.  Too bad it has taken me 10 years of growing and learning to figure this out for myself.  Hopefully, you will make the changes now and not wait 10 years to "get it."


Coconut Oil Is Known To Be:
  • Anti-bacterial (kills bacteria that cause ulcers, throat infections, urinary tract infections, gum diseases, and other bacterial infections)
  • Anti-carcinogenic (coconut oil has antimicrobial properties so it effectively prevents the spread of cancer cells and enhances the immune system)
  • Anti-fungal (kills fungi and yeast that lead to infection)
  • Anti-inflammatory (appears to have a direct effect in suppressing inflammation and repairing tissue, and it may also contribute by inhibiting harmful intestinal microorganisms that cause chronic inflammation.)
  • Anti-microbial/Infection Fighting (the medium-chain fatty acids and monoglycerides found in coconut oil are the same as those in human mother's milk, and they have extraordinary antimicrobial properties. By disrupting the lipid structures of microbes, they inactivate them. About half of coconut oil consists of lauric acid. Lauric acid, its metabolite monolaurin and other fatty acids in coconut oil are known to protect against infection from bacteria, viruses, yeast, fungi and parasites. While not having any negative effect on beneficial gut bacteria, coconut oil inactivates undesirable microbes.)
  • An Antioxidant (protects against free-radical formation and damage)
  • Anti-parasitic (fights to rid the body of tapeworms, lice and other parasites)
  • Anti-protozoa (kills giardia, a common protozoan infection of the gut)
  • Anti-retroviral (can reduce the viral load of HIV-AIDS patience)
  • Anti-viral (kills viruses that cause influenza, herpes, measles, hepatitis C, SARS, AIDS, and other viruses)
  • Effective at improving nutrient absorption (easily digestible; makes vitamins and minerals more available to the body)
  • Has no harmful or discomforting side effects
  • Infection fighting
  • Nontoxic to humans and animals


Coconut oil- GET IT IN YOU!!!!!!!!!!!  (This goes for EVERYONE here.....E  V  E  R  Y  O  N  E !)  So, below are different ways to get coconut oil in you!!!  I am going to write all the ways that I can find, so that no one has an excuse.  There has to be 1 way you can get coconut oil in you.  It would be great if you can do all of the ideas below.  ;-)

Click here for 333 ways to use coconut oil!!!  Soooo cool!

Here is a chart giving you an idea of daily recommended dose: 
Weight in pounds/kilogramsNumber of tablespoons of coconut oil daily
175+/79+4
150+ /68+3 1/2
125+ / 57+3
100+/ 45+2 1/2
75+ / 34+2
50+ / 23+1 1/2
25+ / 11+1


Eat it- (start with 1 tsp at a time and try to work up to your daily recommended dose each day)
1.  Add a tablespoon to your oatmeal
2.  Use it in place of butter on your toast and when cooking or baking
3.  Add a tablespoon to your smoothie
4.  Warm it till it is a liquid (use only warm water) drink it
5.  Stop using olive oil for sauteing and use coconut oil instead
6.  Eat a tablespoon of it off of a spoon (if you don't like it solid, place in mouth and let it melt, then swallow)
7.  Mix coconut oil with organic peanut butter (or almond butter) and cinnamon and spread on sprouted bread or eat out of bowl
8.  Make chocolate candy with it. (oh my! and sooo easy)
9.  Use it to pop your popcorn in and melt and put on your popcorn (not microwave popcorn in a bag!!!)
10.  Add it to your pasta dish
11.  Use on your baked potato
12.  Add it to your bowl of soup
13.  This post could go on forever so go here.  lol
14.  You can also by refined coconut oil to keep on hand when you want a healthier oil but not the coconut flavor

Note: Never microwave coconut oil!  Always place your coconut oil in a small bowl and then place that bowl in another bowl with hot water in it (not boiling) and stir the coconut oil around until it melts.  Heating the coconut oil too hot will destroy all the beneficial properties in it.


Skin and Hair-
1.  Use it on your face (just a little) as your moisturizer and your eyelids and neck
2.  Use it in your hair instead of all that gel, styling foam and pomades with loads of crap in them
3.  Use it for your lotion
4.  If you don't want to use it for your all over body lotion, at least rub some onto your tummy
5.  Use it around your eyes to decrease puffiness
6.  Use it as your chapstick 
7.  Makeup remover
8.  Apply to scrapes and cuts
9.  When kids are sick rub it onto the bottoms of their feet and cover with socks
10.  Dry nose in the winter, swab a small amount inside your nose


Coconut oil pulling- this is 1000 times easier than our minds want to make it out to be!
1.  Brush your teeth with water, no toothpaste
2.  When you wake up put 1 tbsp of coconut oil in your mouth
3.  Wait a minute or 2 for the oil to melt in your mouth
4.  Start swishing when you notice some has melted
5.  Try to keep you head bent down a bit so the oil stays on your teeth
6.  Swish, swish, swish and try to put some between your teeth and lips and pull it back into your mouth through your teeth
7.  Go as long as you can.  First time I went 13 minutes.  Goal is up to 20 minutes every day
8.  DO NOT SWALLOW any of the oil, it will be full of bacteria that has been pulled from your mouth and body
9.  Spit out the oil into a paper towel or in your trash can.  Coconut oil solidifies so you do not want this in your water pipes clogging things up
10.  Rinse your mouth at least 5 times with warm clean water, or warm salt water spitting out the water each time before adding new to your mouth
11.  Now here I find conflicting suggestions.  One suggestion is to brush your teeth with a natural toothpaste and second is to not use toothpaste but to use soap, yes soap, by either swiping your toothbrush on your bar of soap or putting a less than pea size of liquid soap on your toothbrush and then brush.  You can also use baking soda.

Note: 
You have to use organic, virgin, unrefined coconut oil here.  Have to.  
You want to do this on an empty stomach.


Benefits to oil pulling---
Weight lose
Whiter teeth
Strengthen your immune system
Prevent heart disease, cancer, diabetes and arthritis
Radiant skin
Shiny silky hair
Improve digestion
Prevent premature aging of skin


WATCH THIS!!!

Another great article regarding coconut oil and alzheimer's.

Here is the Coconut Miracle book and Virgin Coconut Oil book that I want to read.

Acknowledgements: Thank you Jessica over at Delicious Obsessions!!

Thank you Jennifer at Hybrid Rasta Mama for your 333 uses for coconut oil, your coconut dosing guide, your coconut is know for guide and coconut oil pulling directions and all of your obvious hard work!!!!  Your blog is truly amazing!  I am glad I stumbled across you!  :-)  You inspire me.


NOW GO BUY SOME COCONUT OIL and get it in and on you NOW!!!!!!!  :-)
I have heard great things about Gold Label.  (This is now my ABSOLUTE favorite!)
Organic Gold Label Virgin Coconut Oil 32 oz. glass jar coconut oil photo

I just bought a 54 oz jug from Vitacost.  I can't wait to try it.  (Tried it! = Delish!)  And I no longer buy this.  Now I buy it from Costco.  :-)  See picture below.


I have been using unrefined, expeller pressed from Whole Foods, their 365 line.


Carrington Farms Organic Extra Virgin Coconut Oil, 54 oz
I buy this at Costco for a really good price.  It is not the high quality that you get from Tropical Traditions but it is pretty good.


Friday, October 19, 2012

Homemade Cream of Chicken/Mushroom/Celery Soup Mix.


Ok, so cream of chicken soup, cream of mushroom soup and cream of celery soup were hard for me to give up at first.  Who am I kidding???  I wouldn't be writing this post if I had given them up 100%....right?  Lol

But have you ever read the ingredients on a store bought can of "cream of" soup???  Good grief.  What is 98% of the stuff in there?!?!  Of course don't forget BPA from the can.  Then I thought ok, I will go to the tetra pack organic cream of soups.  Then again....nope.  Aluminum from the lining of the tetra packs leaches into my soup.  Nope.  Not good.  So, I went to the next step.....make my own cream of soup and freeze it.  Talk about yum!  But it does require some time in the kitchen and space in your freezer.  Then I found this....a dry powder that you add water or broth to, bring to a boil, then add to the recipe you are preparing.  Ok, so let's give this a try.

Most of the "condensed cream of" recipes call for bouillon.  Bouillon is a tricky one.  Conventional bouillon is full of MSG and other crap.  Frontier even makes one that is organic.  But after you read the list of ingredients, you think twice.  I've heard about a safe bouillon paste but have not found it yet.  So, I came up with this.  I am open to feedback, so as you make and cook with these recipes feel free to comment below so we can learn from each other.

Here we go...........


Condensed Cream of Powder (this will make somewhere around 8 "cans" of soup)
2 cups organic valley dry milk
3/4 cup organic cornstarch (or arrowroot, tapioca starch or potato starch)
2 tablespoons organic minced onion (blend into a powder in your bullet, food processor or blender first)
1 tsp organic basil
1 tsp organic dried thyme (or organic parsley)
1 tsp pepper

Mix together and store in a glass jar in your refrigerator or freezer.


Cream of Soup
1/3 cup of your homemade powder
1 - 1 1/4 cup of broth or water (this is where I love to use my homemade chicken stock)
1 of the additions below
Whisk
Saucepan

Place 1/3 cup of the dry Condensed Cream of Powder into a stainless steel sauce pan.  Measure out 1 1/4 cup reverse osmosis water (or homemade chicken stock) and set aside.  Review 1 of the 3 options below, depending on what you are wanting to make.  Either cream of chicken, cream of mushroom or cream of celery.

Add 1 tablespoon of your water or broth to the powder and whisk like crazy with a fork or whisk.  (IF you add the 1 1/4 cup of water or broth to the powder you will regret it.  I had to use a submersion blender the first time I made this because the lumps were horrible.)  Once you have a roux (a paste made of your powder and broth) add more broth to the roux and keep whisking.  Slowly add all of the broth while whisking until you have achieved a lump free soup.  Add your choice of additions from the list below and bring to a boil over medium to medium high heat, reduce heat and cook until soup is thick, stir continuously or this will burn.


Add to your dish just like you would if you cracked open a can of the cream of ______ soup from the store.  SOO easy!!!!  AND SOOOOOOOOOOO much healthier for you!!


Additions/Full Recipes
To make Condensed Cream of Chicken soup
Cooked chicken, diced (optional)
1/4 tsp organic poultry seasoning
1 1/4 cup chicken stock or broth (I think the broth offers a fuller flavor over water)

To make Condensed Cream of Mushroom soup
Mushrooms (I bought organic mushrooms at Meijer washed them, diced them and froze them in ice cube trays.  Then I popped out the mushroom ice cubes, placed in a glass storage bowl and froze.  Then pull out how many cubes you want to add to your soup.)
1 - 1 1/4 cup chicken stock or broth (or water)

To make Condensed Cream of Celery soup
1 tsp Organic celery flakes or organic fresh diced celery
1 - 1 1/4 cup chicken stock or broth or water


I wrote the recipe for the powder and for the soups on an index card and taped it to my glass jar.  Now everything is right at my finger tips when I need it.  :-)

Hope you enjoy!

Product Details  Product DetailsProduct DetailsProduct DetailsProduct Details


Popular Posts

Total Pageviews